How to Install Proxmox: A Beginner's Guide
Proxmox VE (Virtual Environment) is a powerful, open-source virtualization platform that allows you to manage virtual machines (VMs) and containers with ease. Whether you're setting up a home lab or running a production server, Proxmox offers robust tools for your needs. This guide will walk you through the process of installing Proxmox from scratch.
Prerequisites
Before starting the installation, ensure you have the following:
Hardware Requirements:
A 64-bit processor (Intel VT-x/AMD-V support recommended).
At least 2 GB of RAM (4 GB or more recommended).
Minimum 32 GB storage for the Proxmox OS.
A reliable internet connection.
Necessary Tools:
A USB flash drive (at least 2 GB).
Software to create a bootable USB (e.g., Rufus, Balena Etcher).
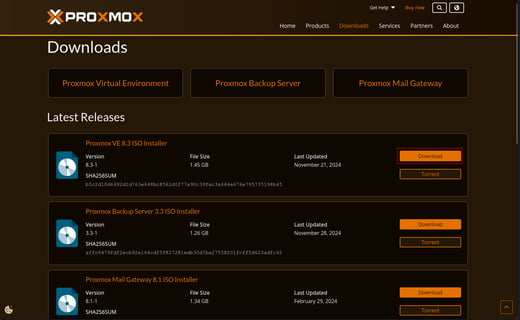
Download Proxmox VE ISO:
Visit the official Proxmox website and download the latest ISO file.
Step 1: Creating Bootable USB Drive
Using Rufus (Windows) or dd command (Linux):
For Windows Users:
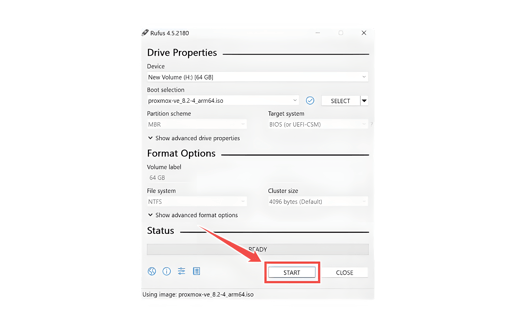
Download and open Rufus
Select your USB drive
Choose the Proxmox ISO file
Use default settings (GPT partition scheme for UEFI)
Click "Start" to create the bootable drive
For Linux Users:
bash
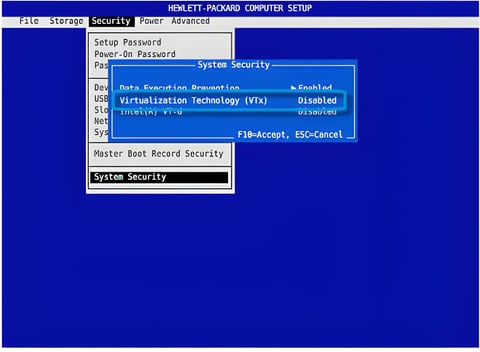
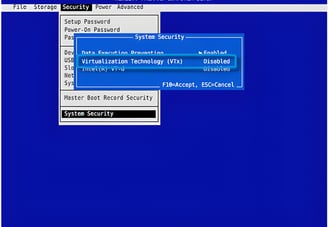
Step 3: BIOS/UEFI Configuration
Restart your computer and enter BIOS/UEFI settings
Enable CPU virtualization (VT-x/AMD-V)
Set boot priority to USB first
Save changes and exit
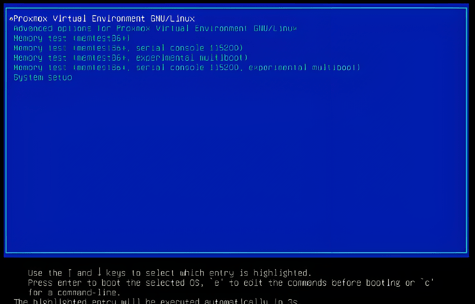
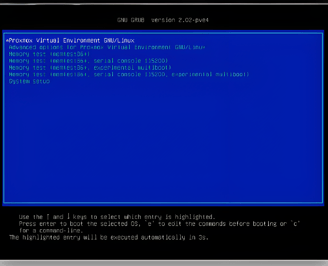
Step 4: Starting the Installation
Boot from the USB drive
At the Proxmox VE boot screen, select "Install Proxmox VE"
Accept the EULA
Step 5: Configuration Settings
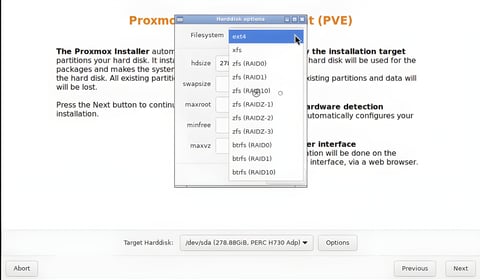
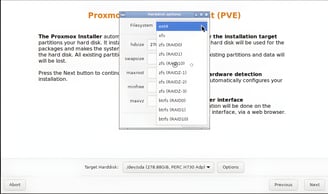
Storage Configuration
Select the target hard drive
Choose filesystem options (ext4 recommended for beginners)
Review and confirm partition layout
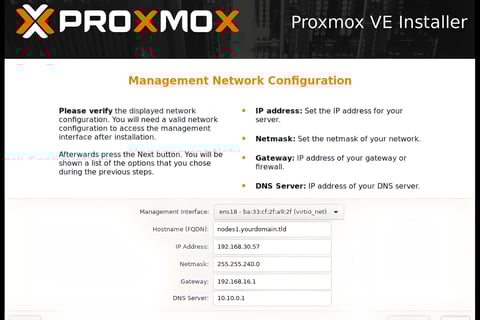
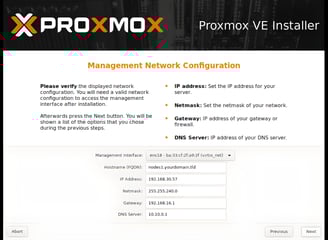
Network Configuration
Select your network interface
Enter hostname (FQDN format: proxmox.yourdomain.com)
Configure IP address settings:
IP address (static recommended)
Subnet mask
Gateway
DNS server
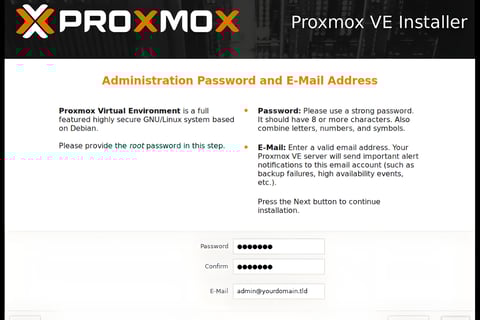
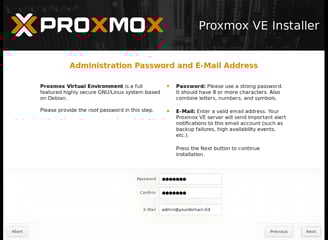
Account Setup
Enter your email address for system notifications
Create root password (use a strong password!)
Confirm all settings
Step 6: Installation Process
Review all settings
Click "Install" to begin
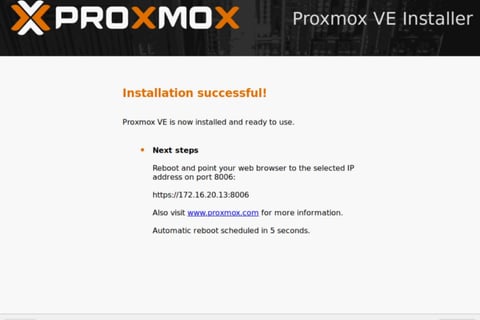
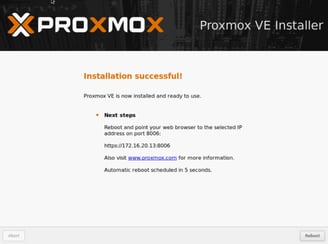
Wait for installation to complete (typically 10-15 minutes)
System will reboot automatically when finished
Step 7: First Boot and Verification
After reboot, note the IP address and port (default: 8006)
From another computer, open a web browser
Navigate to: https://your-ip:8006
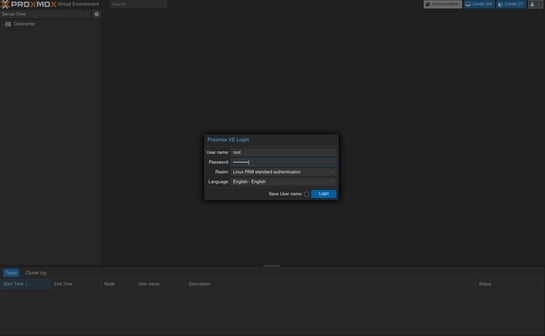
Log in with root credentials created during installation

Post-Installation Steps
Update Repository Sources
bash
Update System
bash
Disable Enterprise Repository
bash
Troubleshooting Common Issues
Network Configuration Problems
If you can't access the web interface:
Verify network settings: ip a
Check firewall status: pve-firewall status
Ensure port 8006 is accessible
Virtualization Support
If VMs won't start:
bash
Conclusion: You’re All Set to Self-Host Like a Pro
And just like that, you’ve installed Proxmox, configured it, and created your first VM. Now you can host pretty much anything—whether it's a web server, a media server, or any other service you need for your self-hosting project.
Next Steps:
Install additional VMs for various tasks.
Explore containers with LXC.
Set up backups and security measures to protect your data.
Now you're ready to dive deeper into self-hosting and Linux servers! Whether you're running a single VM or a whole server farm, Proxmox makes managing your virtualized environment simple and powerful. Get started today and enjoy the power of self-hosting!
FAQs
Q1: Can I run Proxmox on older hardware? A1: Yes, but ensure that your hardware supports virtualization (Intel VT or AMD-V). It may run slower on older hardware, but it will work.
Q2: Do I need a dedicated server for Proxmox? A2: Not necessarily. Proxmox can run on consumer hardware, but a dedicated server or a decent home lab setup is ideal for optimal performance.
Q3: Can I create a Windows VM on Proxmox? A3: Absolutely! Proxmox supports Windows, Linux, and other operating systems for virtualization.
Q4: How secure is Proxmox? A4: Proxmox is secure by default, but ensure you keep it updated and configure firewall rules to secure your system.
If you're all in on self-hosting and Linux, Proxmox is your friend. Let's get your server up and running!