Self-Hosting My Own DNS Server: Pi-hole with Proxmox Helper Scripts
In today’s world of increasing online surveillance and intrusive ads, self-hosting has become a powerful way to regain control over your digital privacy. One of the best ways to achieve this is by setting up a Pi-hole DNS server. This guide will walk you through self-hosting your own Pi-hole using Proxmox Helper Scripts, simplifying the process while ensuring an efficient and private network-wide ad blocker.
What is Pi-hole?
Pi-hole is a DNS-level ad blocker that filters ads and trackers for all devices on your network. By setting up your own Pi-hole server, you can:
Enhance Privacy: Block trackers and malicious domains before they reach your devices.
Boost Browsing Speed: Eliminate ads and reduce loading times.
Achieve Network-Wide Coverage: Protect all devices, including IoT gadgets, from intrusive ads.
Prerequisites
Before we dive in, make sure you have the following:
A Proxmox VE server (I used an HP workstation for my setup).
Basic knowledge of Proxmox and networking.
Access to Proxmox Helper Scripts, a collection of automation scripts for container management.
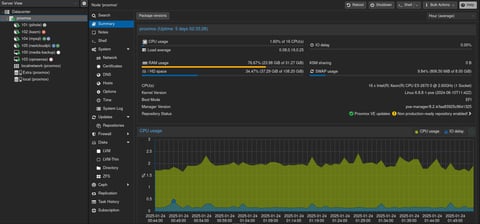
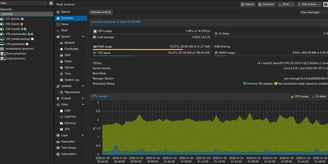
Step 1: Preparing Proxmox
Update Proxmox: Keep your Proxmox installation up-to-date to avoid compatibility issues:
Why Use Proxmox for Pi-hole?
Proxmox Virtual Environment (VE) is a robust platform for running virtual machines (VMs) and containers. It’s ideal for hosting Pi-hole due to its:
Ease of Use: Manage VMs and containers with an intuitive web interface.
Resource Efficiency: Host lightweight Pi-hole containers without overloading your system.
Automation: With Proxmox Helper Scripts, deploying Pi-hole becomes a breeze.
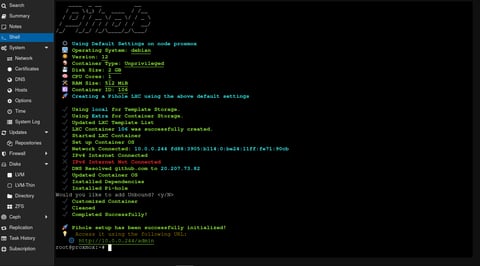
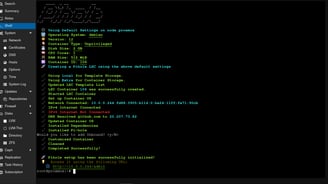
2. Install PiHole using Helper Scripts:Execute the command in Proxmox Shell
Step 2: Configuring Pi-hole
Once the container is created, configure Pi-hole as follows:
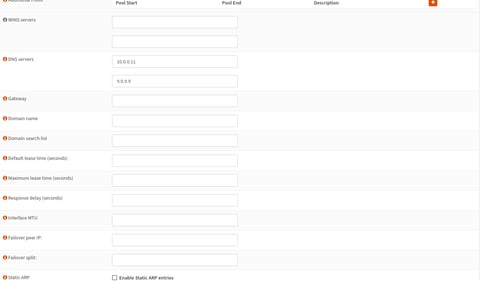
Assign a Static IP Address: During the setup process, assign a static IP to the Pi-hole container. This ensures that devices on your network can consistently use it as their DNS server.
Access the Web Interface: Open your browser and navigate to the Pi-hole admin panel:
Use the credentials provided during installation to log in.
Set Up Upstream DNS Servers: Configure Pi-hole to forward non-blocked queries to your preferred DNS provider (e.g., Cloudflare or Google DNS).
Enhance Blocklists: While Pi-hole includes default blocklists, you can add custom lists for more comprehensive ad blocking. Popular blocklists are readily available online.
Step 4: Monitor and Maintain Pi-hole
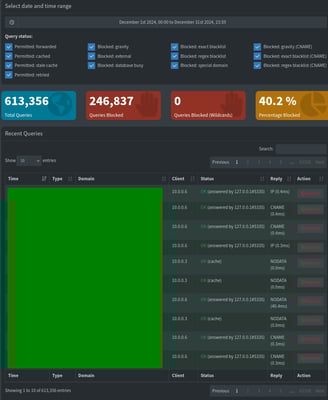
View DNS Queries: Use the web interface to monitor blocked domains and track DNS activity.
Update Pi-hole: Keep your Pi-hole installation up-to-date for improved performance and new features:
Backup Configurations: Export your settings regularly to ensure you can restore your Pi-hole setup if needed.

Common Challenges and Solutions
Networking Issues:
Assigning a static IP within my VLAN setup required adjustments in Proxmox’s network configuration.
Overblocking Legitimate Sites:
Whitelisting domains in Pi-hole’s admin panel resolved these issues.
Conclusion – Why Self-Hosted DNS Rocks
And there you have it—a fully functional Pi-hole DNS server on Proxmox.
By now, you’ve:
Created a Pi-hole VM.
Automated the setup with helper scripts.
Configured DNS and blocklists.
Integrated Pi-hole into your network.
The benefits?
No more ads.
Better privacy.
Full control over your network.
Ready to take it further?
Experiment with more blocklists, add a second Pi-hole for redundancy, or dive into advanced DNS settings.
FAQs
Q: Do I need a powerful server for Pi-hole?
A: Not at all. Pi-hole runs smoothly on minimal resources.
Q: Can I use Pi-hole with other self-hosted apps?
A: Absolutely! Pi-hole pairs well with apps like Nextcloud or Home Assistant.
Q: What if Pi-hole goes down?
A: Set a secondary DNS server (e.g., Cloudflare) as a backup.
Q: Is Pi-hole legal?
A: Yes, it’s completely legal to block ads on your own network.
Final Thoughts
Self-hosting your DNS server with Pi-hole and Proxmox is a game-changer.
It’s simple, effective, and puts you in control.
Whether you’re a self-hosting enthusiast, a privacy-conscious individual, or a home lab user, this setup is for you.
So, what are you waiting for?
Dive in, block those ads, and take back your internet.
Keyword: Self-hosting, Self-hosted, Linux, Servers